From home decor products to independent clothing brands, Shopify is home to over 500,000 businesses. For many sellers, features like fraud analysis and abandoned cart recovery are game-changers because they simplify ecommerce and make it easy for sellers to focus on other parts of their business.
In particular, the report feature — specifically the Shopify sales tax report — is a time-saver, but it highlights an interesting issue all ecommerce sellers face: tax collection. Collecting sales tax seems small on the surface, but, in reality, it’s one of the most frustrating parts of selling online. It takes more time to add your products to your store, market them, and then ship them, and yet this one line item on customer invoices is the cause of frustrated emails to customer support and sleepless nights.
Since it’s only been less than a year since ecommerce sellers have been required to collect and remit state sales taxes, the confusion around setting up taxes on ecommerce platforms makes sense. There are a lot of tax rules to keep straight, which make filing taxes a pain.
To take the confusion out of tax set up and reporting, we’ve put together this guide to help you understand how Shopify sales tax works.

The basics of collecting sales tax for your Shopify store
Before we get into the weeds of Shopify sales tax, there are a few tax rules you need to be aware of first. These rules determine how you set up and report your taxes.
1. You need a sales tax permit
Economic Nexus is the tax legislation for companies that don’t have a physical presence in a state — they sell online. Read more about sales tax nexus here. Each state dictates what economic threshold sellers have to reach to qualify for this. For most states, the threshold is $100,000 in sales or 200 transactions. Check your state’s threshold to confirm. The threshold is set annually, so it’s your responsibility to check every year to make sure you comply with the rules.
Once you’ve hit your state’s threshold, you have to register for a sales tax permit. Head over to your state’s Department of Revenue website to review the rules — for example, whether you have to renew your permit once you have it — before registering.
Different states have different names for sales tax permits — like a tax license or sellers permit — but rest assured, they’re all the same thing and the registration process is pretty much the same regardless of which state you’re in:
- Register your business and business name.
- If needed, apply through the IRS for an Employer Identification Number (EIN).
- Complete the registration form, which usually asks for your business type, business launch date, and your contact information.
Here’s part of the application form for Florida:
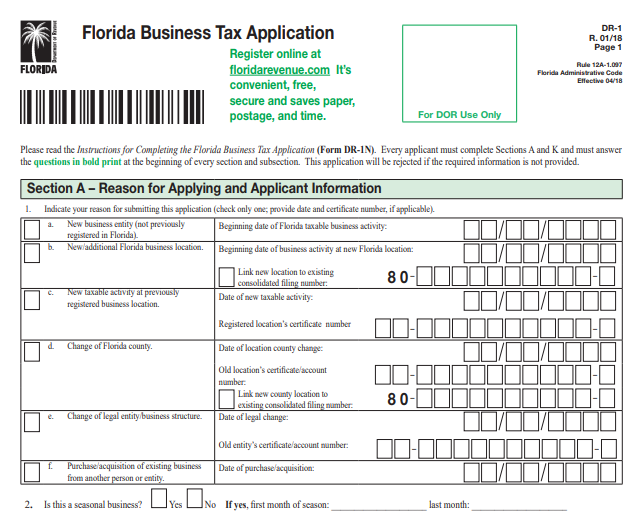
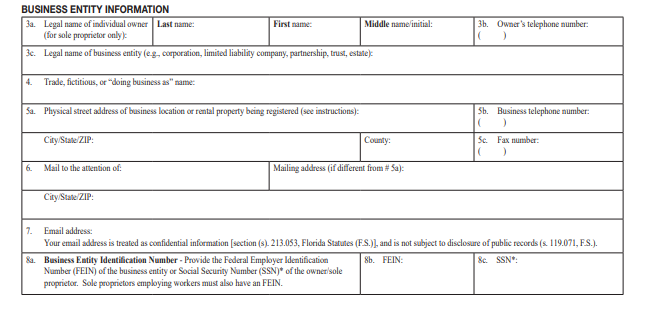
[Source]
In most states, it’s free to register for a sales tax permit. In other states, like Wisconsin and South Carolina, the fee can be as much as $30 or $50.
Even if you only sell products online, you still need a sales tax permit. Get one for every state you do business in or have some kind of presence. For example, you might be based in Georgia but store your inventory in South Carolina. You need a permit for both states.
2. Not all states require you to collect sales tax
Currently, 45 states and DC require ecommerce sellers to collect sales tax under Economic Nexus. What complicates Shopify sales tax setup is the fact that rates and rules vary from state to state. For example, something as simple as whether you can charge tax on shipping or whether you have to renew your sales tax number varies between states, cities, counties, and districts.
Click on the tax map below to find out what the requirements are in your nexus state(s):
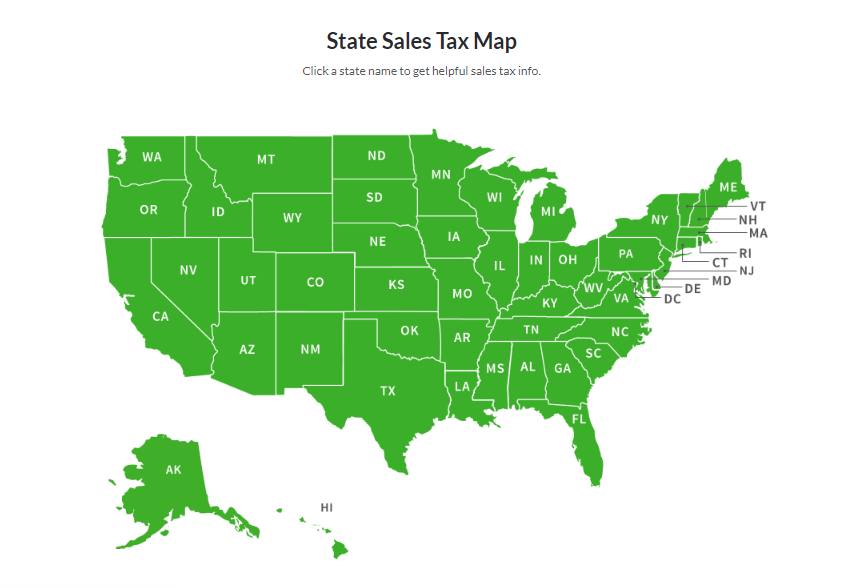
[Source]
You can use this information to verify the tax rates Shopify uses when you set up your sales tax. We’ll go into this a little more later on.
3. Remittance frequency differs by state
Tax remittance — the process of taking the sales tax you collect and paying it to the IRS — also differs state by state. Once you’ve registered for a sales tax permit, the taxes you collect have to be paid monthly, quarterly, or annually. The state will explain what applies to you and your business. Sales tax is considered a pass-through tax, and payment frequency depends on each state.
4. There are two kinds of sales tax
The states you operate in will also tell you whether you have to calculate taxes on a destination-basis or an origin-basis. Here’s how they work:
Destination-basis: Shopify sales tax is calculated based on where each of your customers is located. If you have nexus in an origin-basis state like Ohio, and you sell products to a customer in Utah, sales tax is based on Ohio’s tax rate.
Origin-basis: Shopify sales tax is calculated based on where you’re located. If you’re in a destination-basis state like Michigan and sell products to a customer in Maine, sales tax is based on Maine’s tax rate.
The following states use an origin-basis tax system:
- Arizona
- California
- Illinois
- Mississippi
- Missouri
- New Mexico
- Ohio
- Pennsylvania
- Tennessee
- Texas
- Utah
- Virginia
This is a lot of information to keep track of, but, fortunately, Shopify takes a lot of the guesswork out of setting up and collecting sales tax. This way, you have confidence that you’re collecting sales tax legally and correctly.
How to set up taxes for your Shopify store
Before you can start collecting Shopify sales taxes, you need to set them up. This is probably the most time-consuming step in setting up your store since there are so many variables to keep straight — it can get confusing. Here’s a simplified version of how to get started:
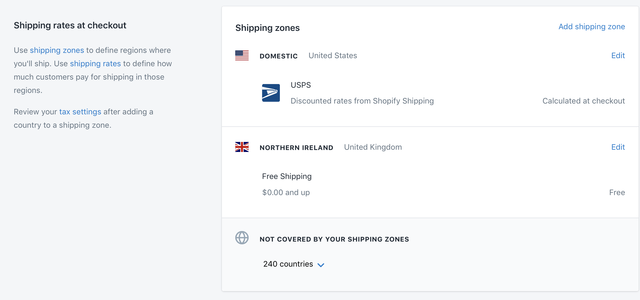
Step 1 – Create shipping zones
This specifies where in the world you sell your products. Since states and cities have their own tax rates, create a shipping zone for each one. This is especially useful if you’re in a destination-basis state, and tax is calculated based on customer location.
To create shipping zones, click on Settings → Shipping. In the Shipping zones section, click on ‘Add shipping zone’:
[Source]
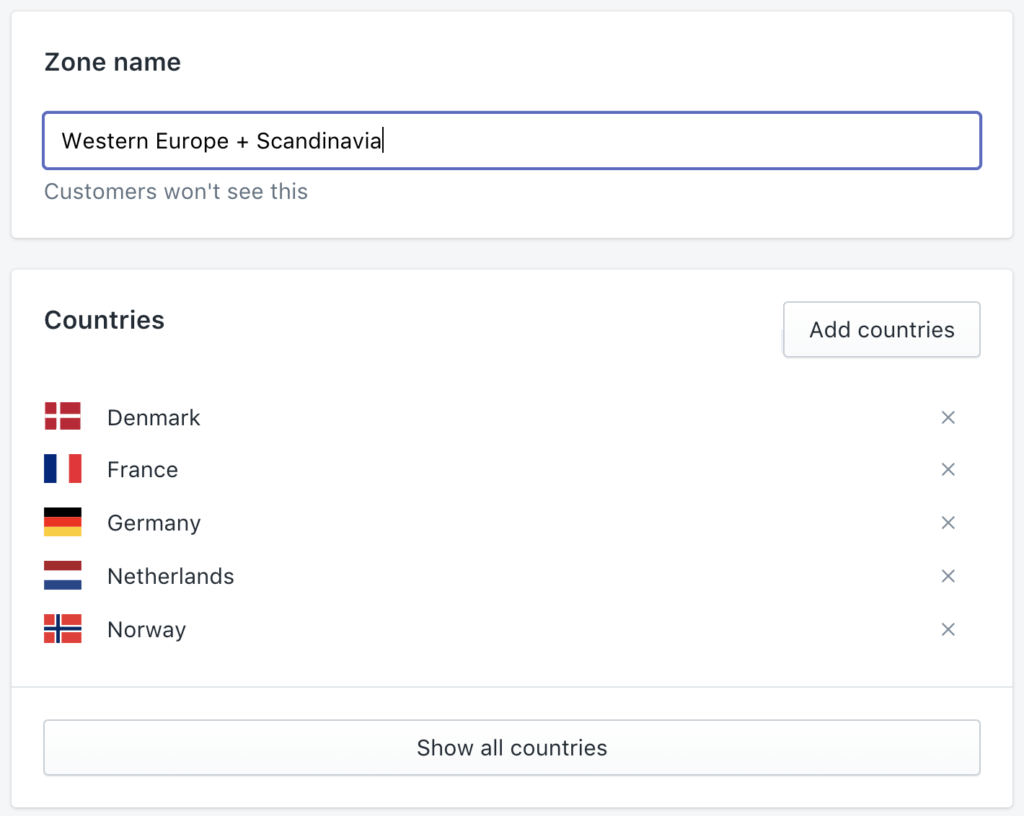
Give your zone a name — for example, the country or region name — and then add in countries. Add all the countries that you want to include in the shipping zone:
[Source]
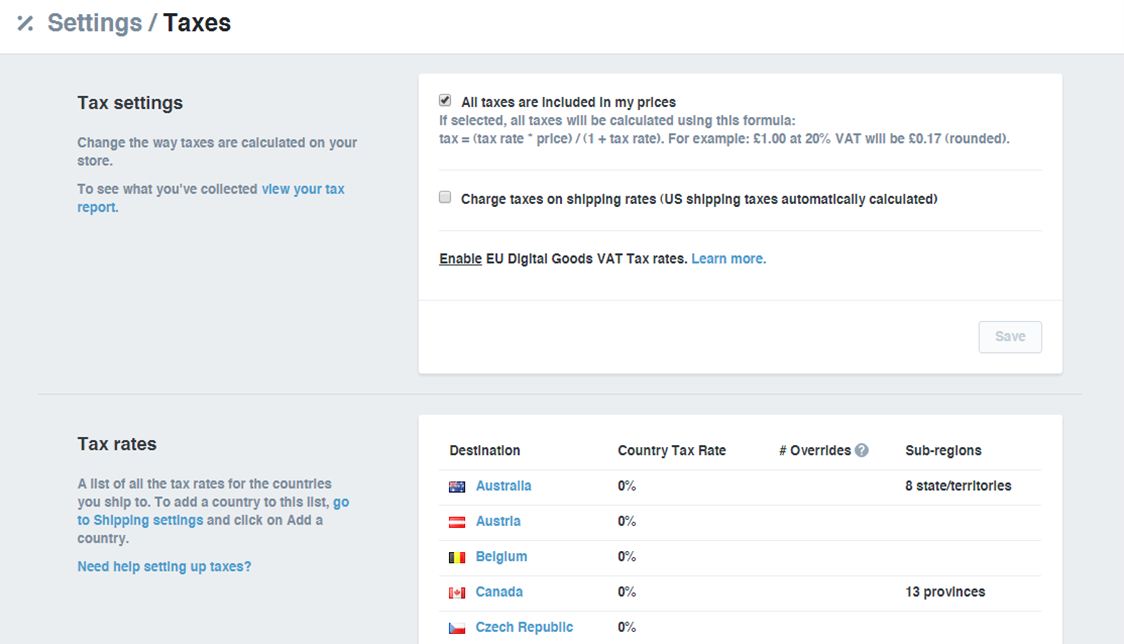
Step 2 – Set tax rates
Set up the tax rate to account for all the shipping zones you’ve created. Shopify sales tax rates can be set automatically to make this process less confusing.
Go to Settings → General and set your address based on your nexus. Then go to Settings → Taxes and add in tax rates. Set these taxes to calculate automatically so that Shopify manages the calculation of sales tax based on state, county, and local tax rules. It’s worth reviewing these figures annually to make sure Shopify sales tax is calculated using the most up-to-date rates.
[Source]
Remember, your Economic Nexus depends on where you have some kind of physical presence since, as of June 2018, all ecommerce sellers are required to collect sales tax. With Shopify, you can set up sales tax to calculate based on a destination-basis or an origin-basis.
Step 3 – Set tax exemptions
You can also set tax rates to calculate manually if there are certain products that are exempt from taxes — like clothing in some states.
To set up tax exemptions, you have to first create a product collection for it to apply to. For example, create a collection for your clothing products, and all products in the group will get the exemption.
To create a collection, click on Products → Collections and click on ‘Create Collection.’ Give the collection a name and save it.
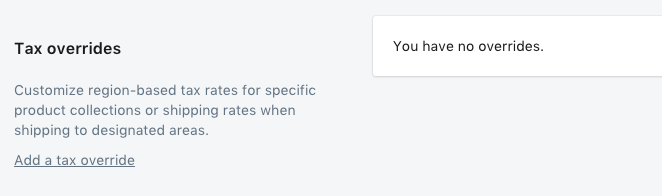
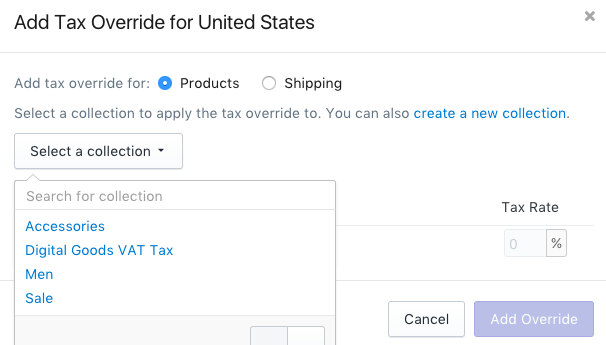
Next, go to Settings → Taxes and click on one of the countries listed. This tells Shopify where the exemption should apply. Click ‘Tax overrides’ in the new window, click ‘Add a tax override,’ and choose a collection from the dropdown menu.
[Source]
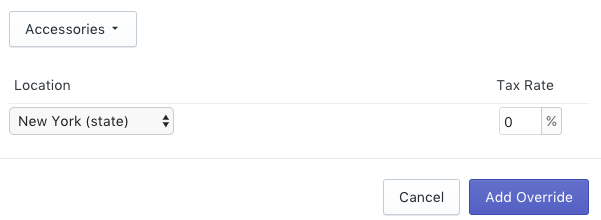
Finally, choose a location the exemption applies to and the rate, then click on ‘Add override.’
[Source]
Automation to simplify sales tax tracking
Shopify doesn’t remit taxes on behalf of the sellers. It’s your responsibility to know how much you owe, when to pay, and how. The good news is since payments are processed through Shopify’s platform, you have access to reports that make tax time less of a hassle — especially if you file frequently throughout the year.
There are a number of sales report you have access to. For example, the tax filing report shows you how much sales tax you’ve collected during specific time frames. Whether you file your taxes monthly, quarterly, or annually, this report can be customized to show you what you need.
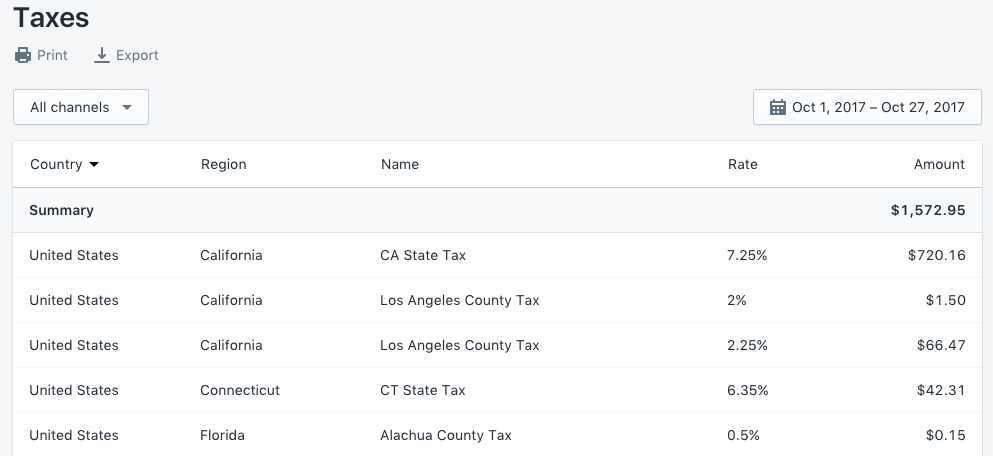
[Source]
As you can see from this example, the tax report shows you which countries and regions you collected sales tax from plus the rate and total amount. Every time there’s a transaction processed from your store, this report automatically updates to track your Shopify sales tax to date.
What’s also great about this report is it takes into account the destination-basis and origin-basis you set up when you created shipping zones. If you’re using Shopify’s automatic tax rate calculator — which is updated regularly — you can have confidence that the values in this report are accurate.
Simply export the data from this report and send it to your accountant to file at tax time.
Plugins for monitoring sales tax collection
Since calculating sales tax can get complicated, a plugin takes the manual work out of it and automates monitoring state sales tax so that you’re sure you’re collecting the right amount. The last thing you want is to have to pay out of pocket because you didn’t collect enough tax during your reporting period.
Use Shopify-integrated plugins like TaxJar, Avalara, and Quaderno to simplify your sales tax responsibilities and take advantage of features like auto-filing your returns:
TaxJar
Since tax rates vary by states and cities, TaxJar helps you track what you’re charging to make sure you’re in compliance. Shopify helps you set up and collect sales tax, but there aren’t detailed enough reports that help you file your taxes automatically. TaxJar helps with this step by creating detailed reports that show you what tax was charged for each state and country you sell in. This saves you hours of tax prep time and ensures your filings are accurate.
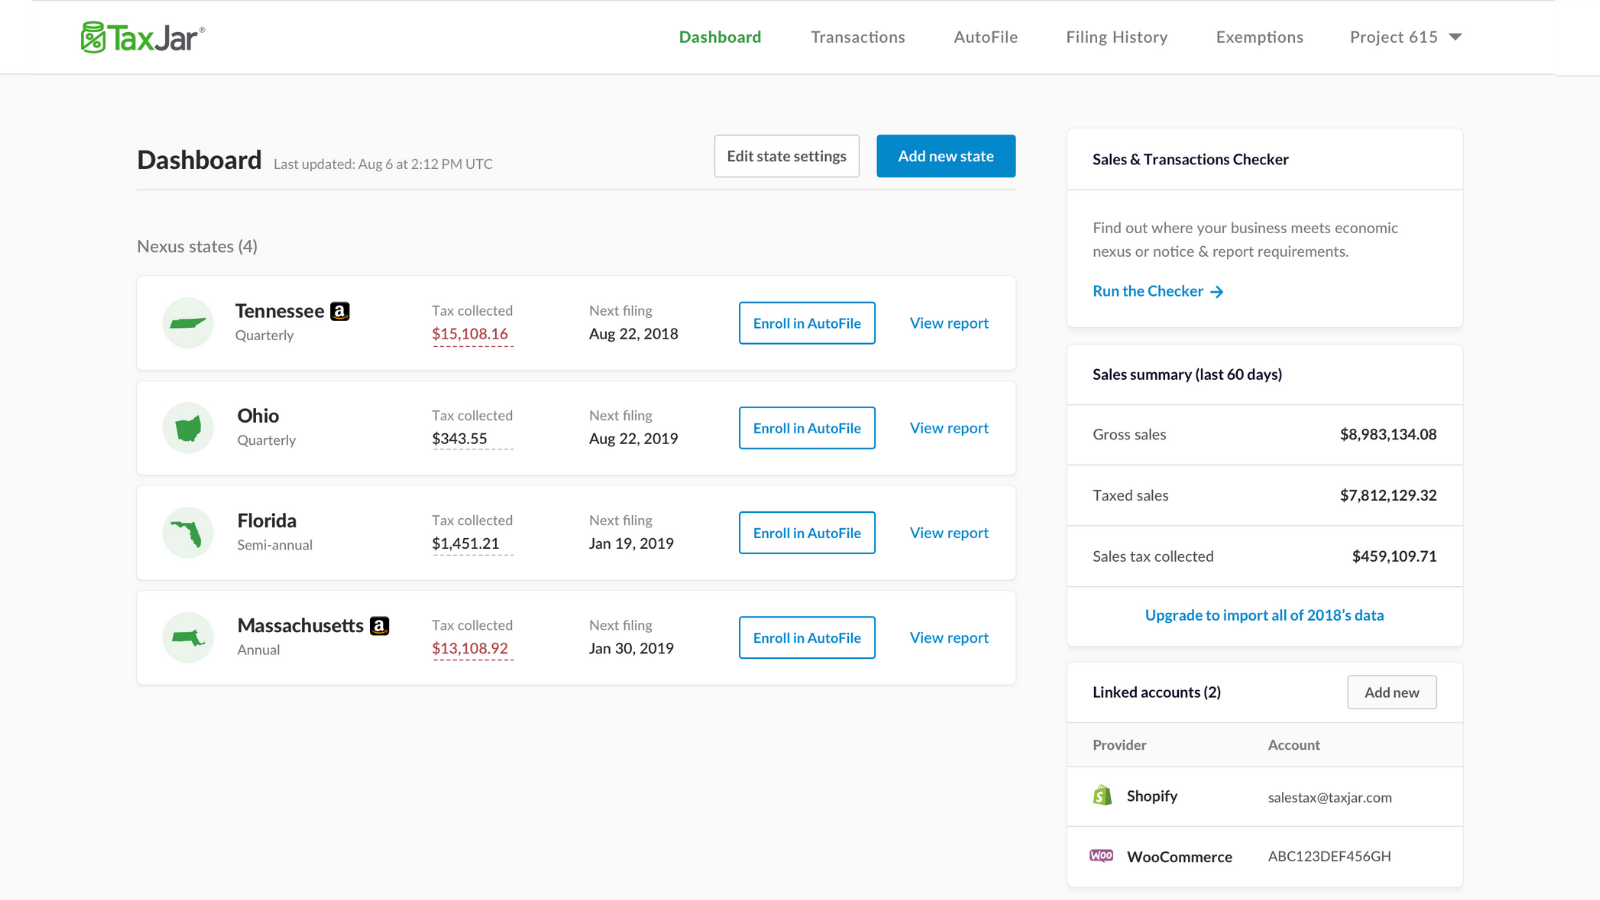
[Source]
Avalara
Filing taxes for your business can be a stressful time. Avalara helps by automating the preparation and filing process. For example, it tracks when your sales were made and automatically adds them to reports based on your filing requirements. If you remit sales tax monthly or quarterly, these reports save you hours of digging through your transactions to separate and organize the sales tax you’ve collected.
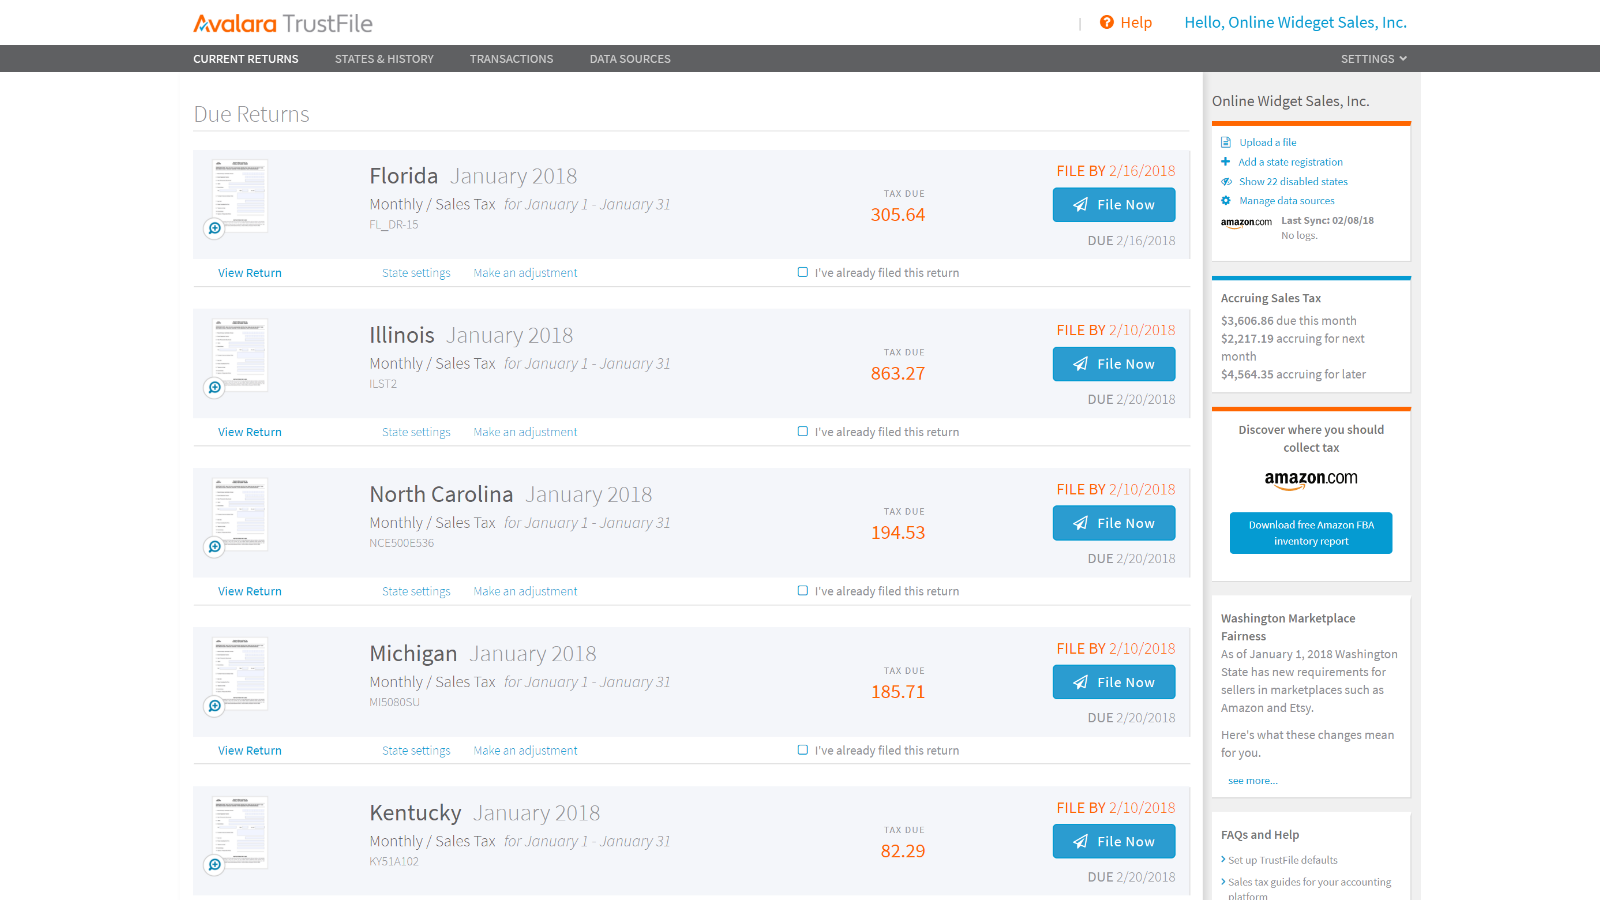
[Source]
Quaderno
Quaderno is another tool designed to help you during tax time. It’s kind of like a personal accountant that manages your invoicing and bookkeeping so that you’re always in compliance with tax laws and have one less thing to worry about when you file your taxes. Since every seller is different, Quaderno is completely customizable, so you can set it up based on your unique needs — like letting customers check their billing history vs. you sending this info out every time customers ask.
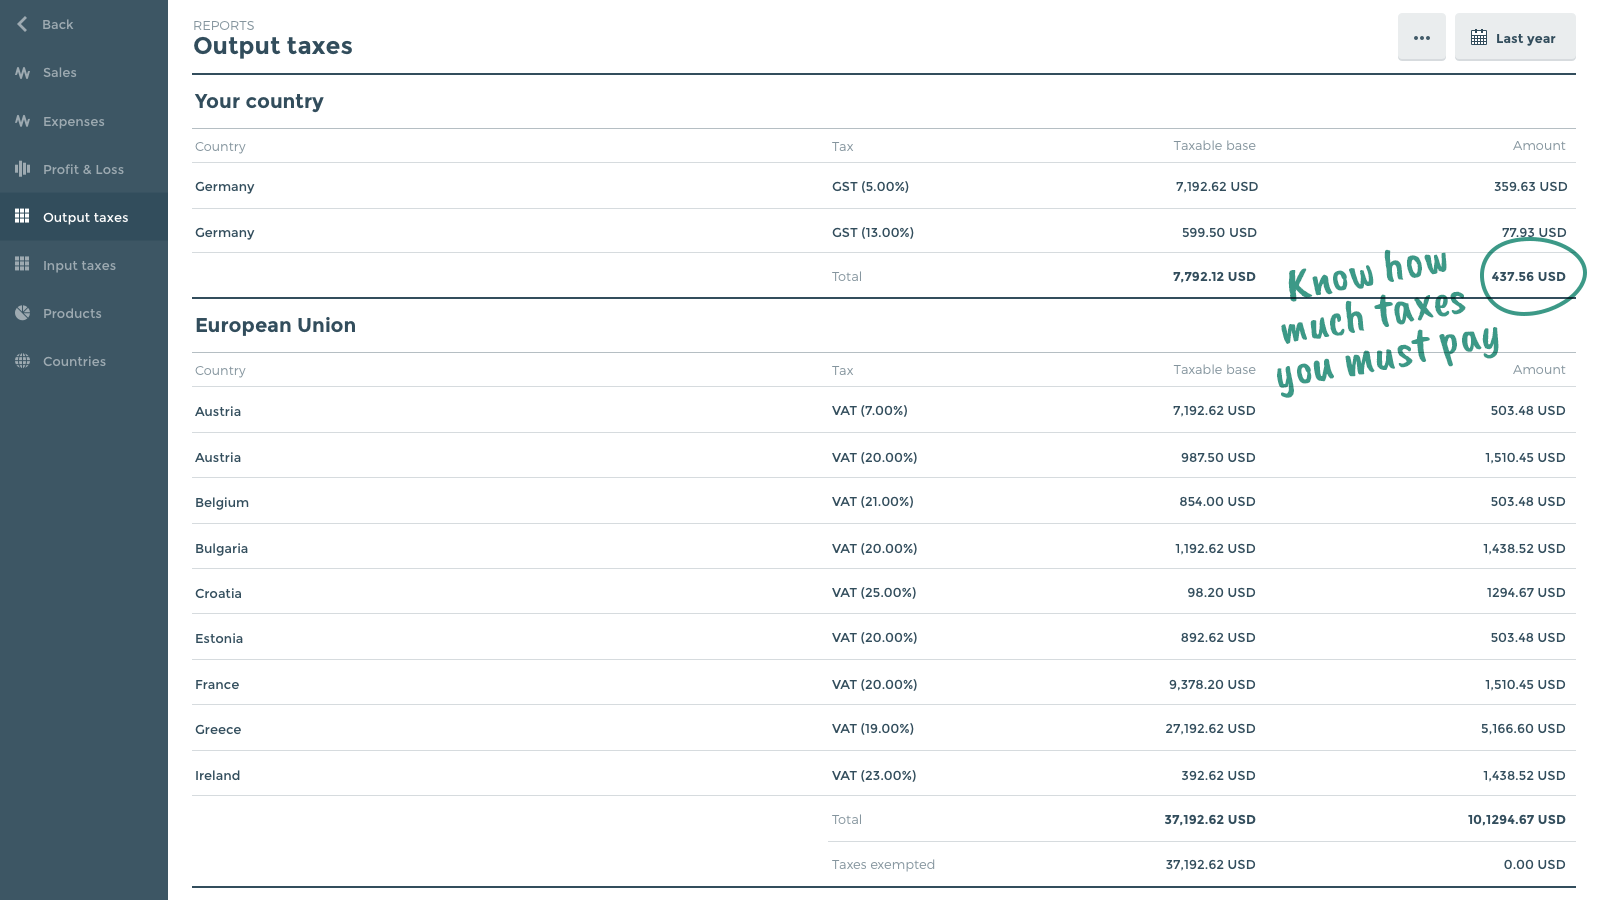
[Source]
Best practices for setting up Shopify sales tax
Once you’ve set up taxes and have a reporting and filing system in place, there are still a few best practices to keep in mind to ensure you’re following the rules of the states and cities you sell in. And don’t forget, managing the customer experience is part of managing your sales tax as well. Setting up your shop properly takes time and accuracy, and customers need to have a seamless experience so they come back again:
- Include a physical location for your store even if you only sell products online. Shopify requires this information to help with destination-basis and origin-basis tax calculations.
- Confirm which forms you need to file your taxes. Ask your state government once you have your sales tax permit. Forms differ based on whether you’re a sole proprietor, partnership, or corporation.
- Add sales tax as a separate line item at checkout to make it clear to customers what they’ve been charged. Also, if your state requires it, charge tax on shipping.
- Set up tax overrides to only collect tax on taxable items. For example, New York considers clothing sold for less than $110 non-taxable.
- Use robust software to scale your business. Avalara AvaTax is available to sellers on the Shopify Plus plan and is more powerful than Shopify’s built-in tax tracking and calculation feature. It offers real-time reporting using tax rates from over 12,000 taxing jurisdictions and makes it easy to collect ‘value-added tax’ (VAT) from customers in EU countries.
Making sense of Shopify sales tax
It takes a little time to set up sales tax in Shopify properly, but hopefully, we’ve made the process easier to understand. Taxes are one of the most important parts of doing business, so take some time to understand how they work in your state and the other states and countries you sell in. This way, you can focus on the parts of your business you excel in and add value to the customer experience.
